Like most jobs, what we do at Ozmo can oftentimes be very stressful. We have many hurdles - impossible deadlines, shifting client and consumer needs, the constantly changing landscape that is the interwebs, and more. Different people like to deal with stress in different ways, be it foosball, walks, naps or reading.

For stress relief, one activity many of us at Ozmo have found helpful is playing video games. Quick 15-minute sessions of blasting virtual enemies, battling your way to a finish line, or playing a completely nonsensical and awesome game of soccer with rocket cars are great outlets for clearing your mind and resetting during the day and after work.
How It Started
More than a year ago, Tom Yancey, Chris Mitchell, Michael Kessler, Kyle Krcmaric and I starting toying with the idea of creating the “Ultimate Gaming Arcade.” We wanted a unit capable of playing every retro game from every old school console. We also wanted our arcade to play newer titles on Steam, an online game publishing platform.

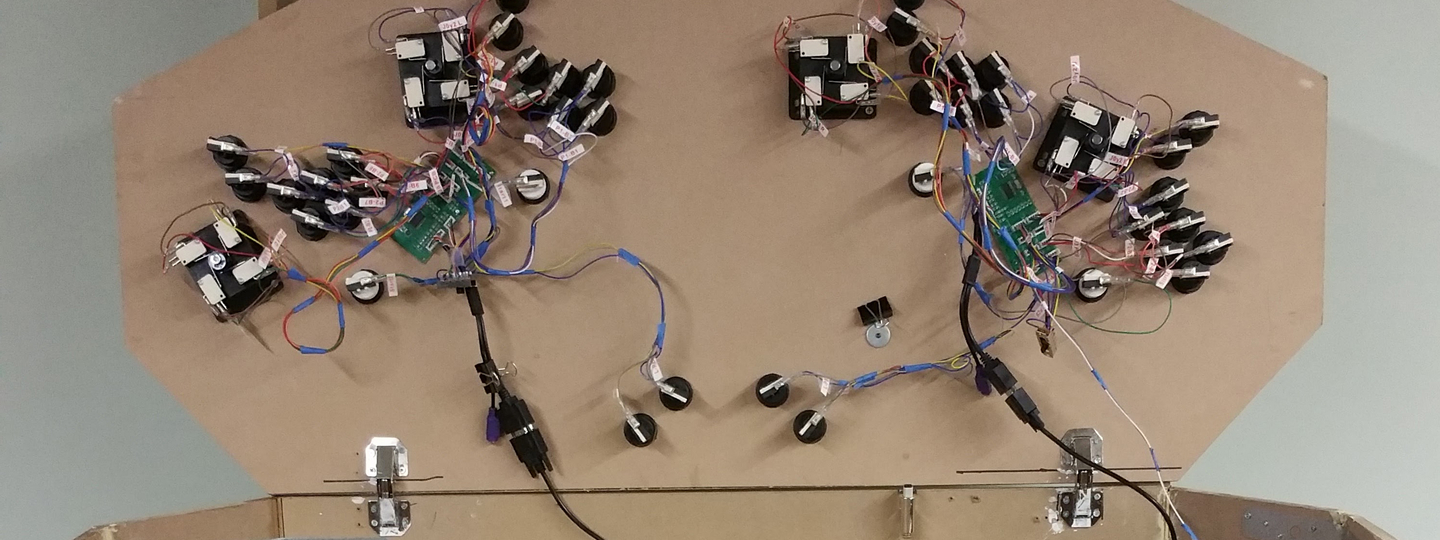
With zero previous knowledge and the help of Google, we began creating what would eventually become the Arcade Cabinet. Things started out small. We began with scrap wood, a cordless drill and parts sourced from the internet. And, as projects tend to do, things got bigger and more complicated. We went from two sets of controls on a piece of Tom’s old desk to a set that allows four people to play together simultaneously.


Things Slow Down
As deadlines loomed and new projects increased, work on the arcade slowed. The move to our new space in the basement of Kent Square and work on a new game room hindered progress even more.

Then, this summer I decided to dive in head first. After more internet research and about 12 trips to Home Depot, I had everything needed to create an actual Arcade Cabinet -- well, everything except most of the tools necessary to put it all together. Thankfully, Aaron Herrington and David Bates were willing to loan me theirs.

And things got started again. Nights and weekends were spent measuring three times and cutting twice, a process of trial and many errors. Week by week, the stack of wood and kitchen cabinetry parts slowly turned into an arcade cabinet. Add a 39" TV and an old workstation donated by Ozmo and we now have a fully working Arcade Cabinet -- for the most part.


Construction
There's still a bit to do in terms of setting up software to play all of the retro games. Nobody likes to spend 20 minutes figuring out how to launch their favorite NES game from a command line interface. Trying out, customizing and evaluating different software solutions like Xbox Media Center and HyperSpin will take quite a bit of time, but we'll get it done and make it easier for players to enjoy the classics.

What's Next?
Medium-density fibreboard brown isn't the most attractive color scheme, so a paint job and custom vinyls are in the backlog. The current old Angry Birds plushes will be replaced by a custom lighted marquee. Cable management, adding controllers for older systems and getting everything as streamlined and clean as possible are also items that need to be tackled.

Cabinet Built
Overall, building this has been a pleasure and great learning experience. I think it's very important to occasionally create something tangible, especially with working mainly in the digital space. Seeing people enjoying newer games like Rocket League and classics like the X-Men arcade game on a full stand up Arcade Cabinet is pretty amazing when I think about the humble beginnings of a plank of wood, some buttons, and some joysticks.

I'm really looking forward to improving the cabinet even more. I think it's one of those things that will never truly be finished, but that's one of the great things about DIY projects that I tend to enjoy!


